Showing posts with label crafts. Show all posts

29 July 2014

Family Command Center

So, the Bear has been taking an interest in doing chores and earning money lately.  I don't mind paying good money for the housework to actually get done (since I rarely get a chance with Bitty Bear still nursing 'round the clock at almost 13 months). But it was hard to keep track if I didn't want to go help him fill his piggy banks after every chore.  So...

The Family Command Center was born.  At first, I was just trying to find a chore chart...but then I remembered that I needed to replace the wall calendar...and that Hubby is always losing my keys because he forgets that I commandeered the hat hook he had before we were married...and that Hubby and I had never remembered to put the diaper bag in the same place twice...and that we all constantly forget to take our vitamins...and that the Bear frequently misplaces library books (we've only been late once, but I don't want to become that homeschool mom).

I'm just going to be real with you.  This got way more expensive than I planned.  I told Hubby that I'd seen other bloggers do stuff like this for about $50.  Those other bloggers obviously weren't at the end of their rope, needing to get organized yesterday, and had time to wait for everything to go on deep clearance.  But even though Hubs is usually the frugal one, and I was in tears over the price tags, he said we needed to do it right the first time, since we are planning to use it at least until we have an empty nest.  I love that I have finally gotten through to him that it is cheaper to buy quality the first time than to constantly replace.


Here is the Command Center in all it's glory.  No, we can't open the pantry door/back door all the way anymore.  What of it?

I got the big chalkboard at my local teacher supply store.  The parts that I wanted to have on there permanently (calendar grid, menu grid, family "established" sign, Bible verses) were done with oil based paint pens (black, white, silver, gold).  "Funny" story about the days of the week being black on white.  I had written them all in white, but I decided to decorate around the ones on the calendar with silver, and it ended up looking kinda stupid.  Then I put Monday first on the menu and basically had a meltdown. So I used Po-leesh Remover of Nai-eel to get some of the paint off, then painted over the damaged area white (because acetone does damage chalkboard). Then I re-wrote the days of the week in black. #problemsolving  Each member of the family has his/her own chalk color, so that we know if an event/shopping list item/memo is specific to someone (and so we know who is responsible for feeding us on any given night).


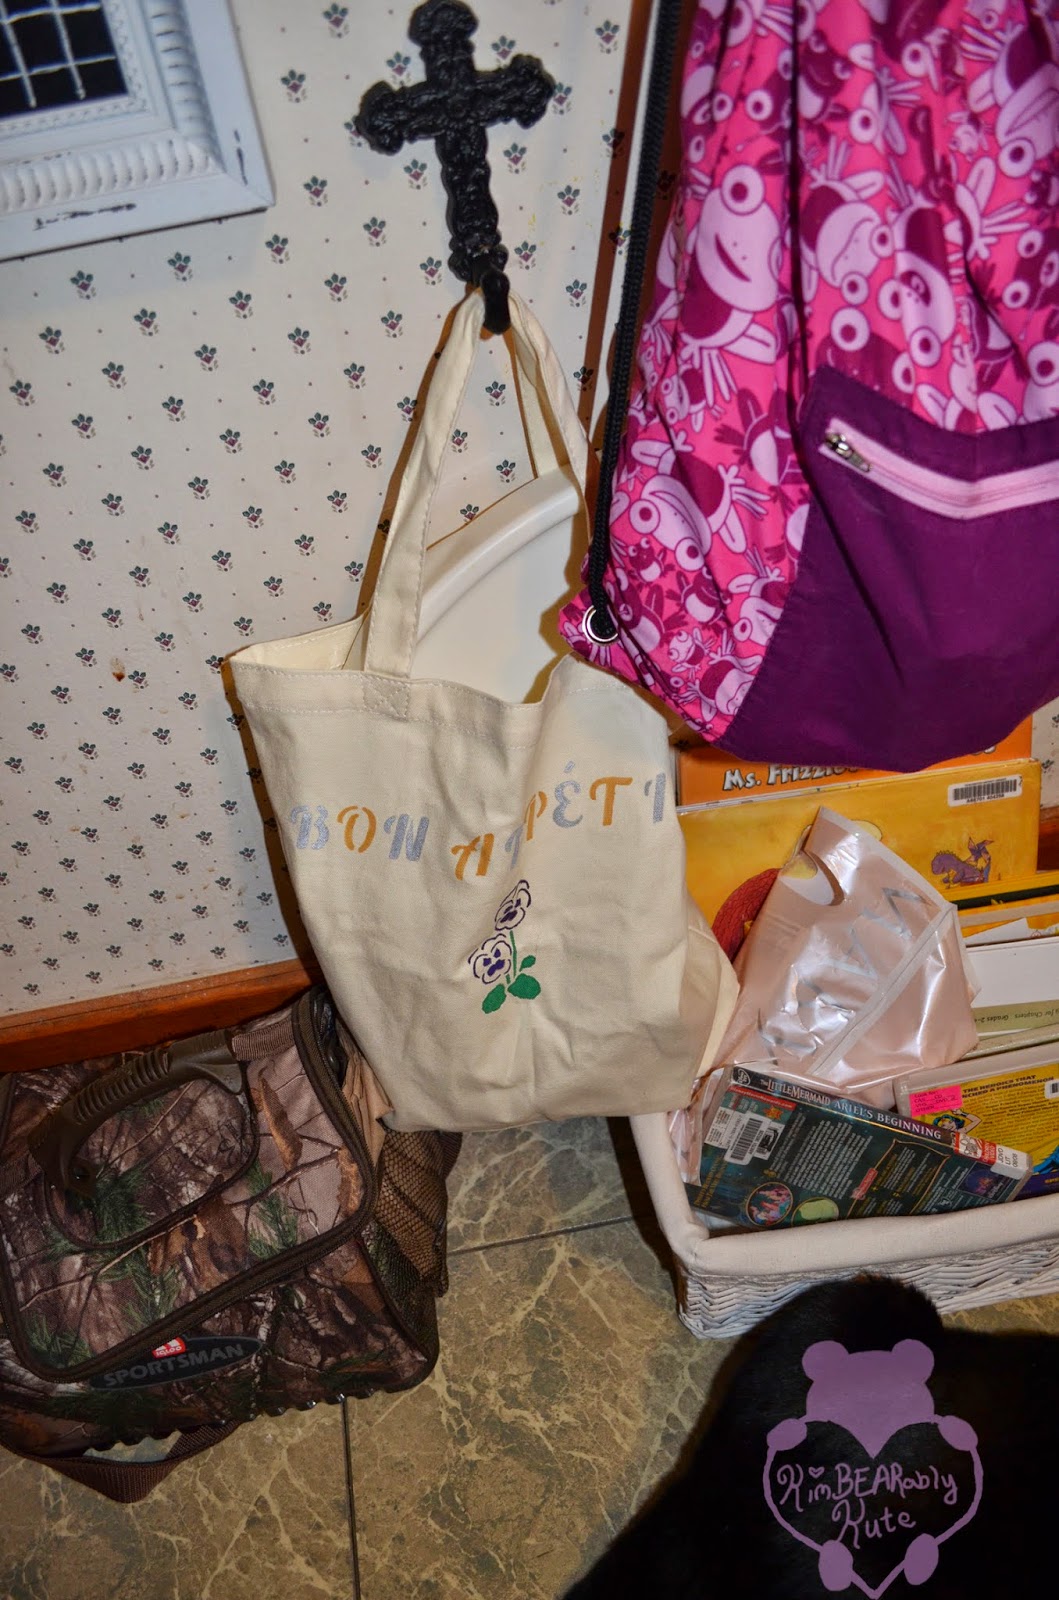
I got the hooks at my fave craft store Hobby Lobby.  They were closed when I came up with the bag idea, so I got the canvas bags, fabric markers, and stencils at Michaels.  "Apothecary" holds our daily vitamins, "Bon Appetit" has things like bibs, and "Al Fresco" contains reusable snack containers and other things we need for eating outside of our home.


I got these babies at Hobby Lobby, also.  I couldn't bear to use the oil based paint on them, in case I ever wanted to do something like this. I made those nice, straight grid lines with masking tape. All of the chores the Bear can earn money for are listed, and we can check them off as he does them each day of the week.  That way, we can wait until Saturday night to pay him.  His check marks are blue...presumably someday Bitty Bear will add pink check marks.  We had extra room on the second board, so Hubby came up with the idea of checking off if we remembered our vitamins.  We have spaces to mark for who gets to take what day as a Sabbath each week, and plenty of room leftover for prayer requests.

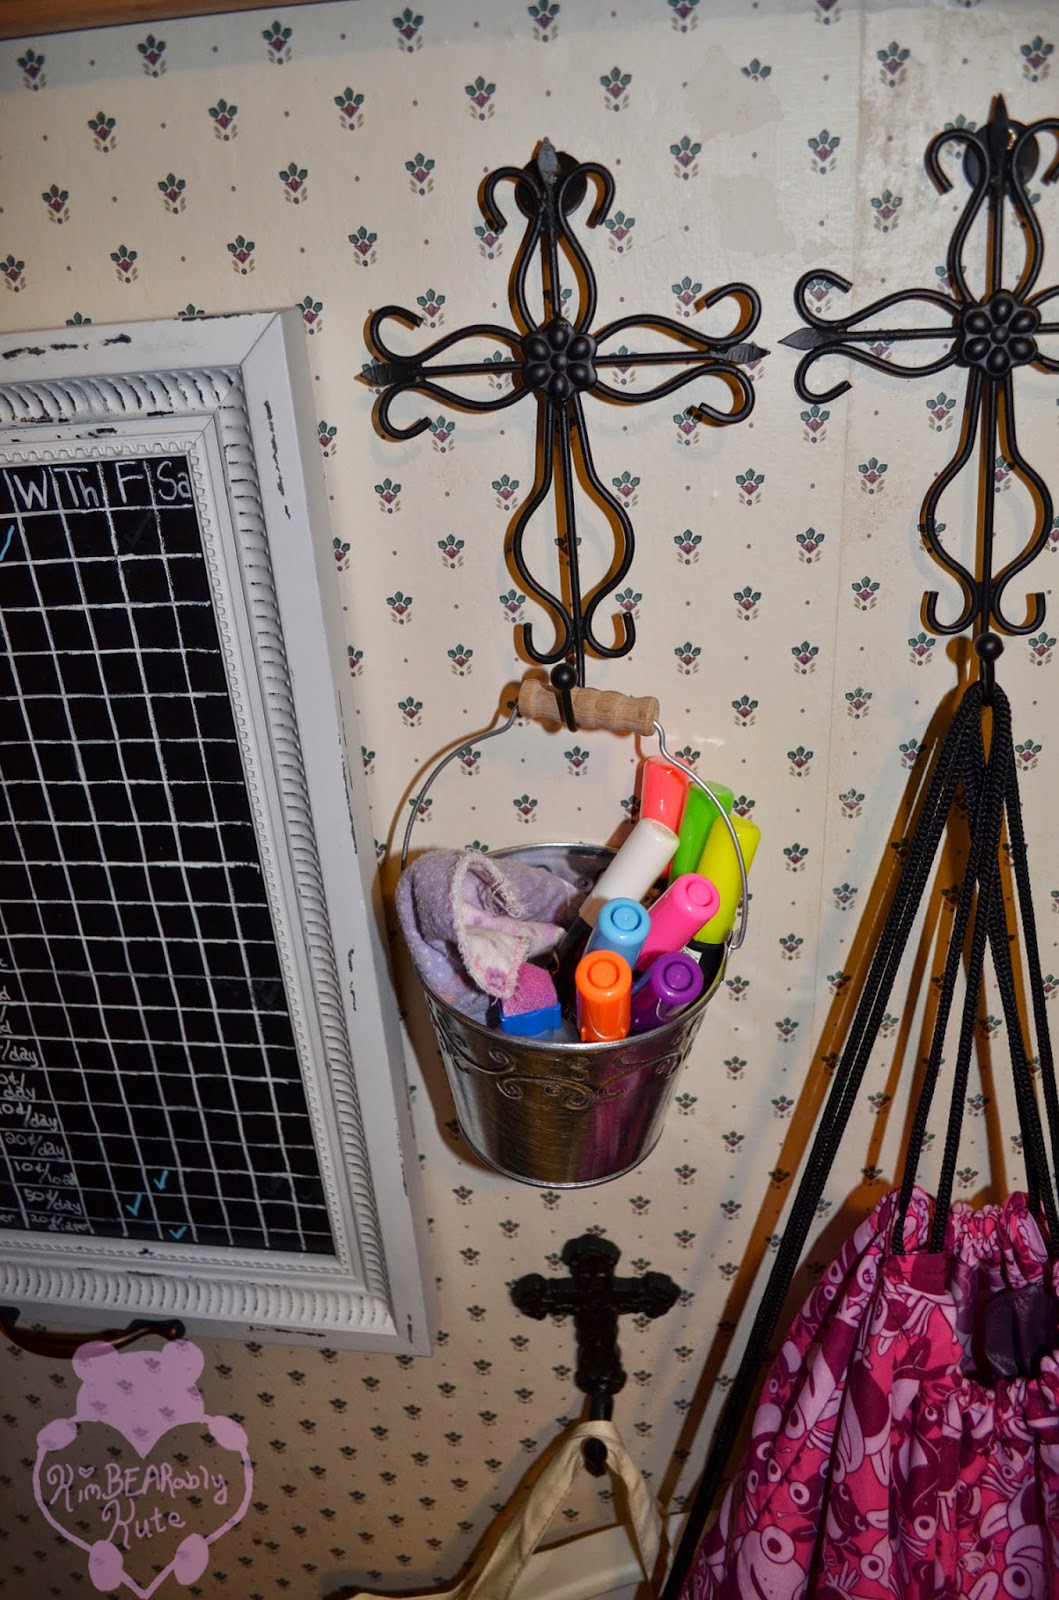
We keep our chalk markers in this little tin bucket (yay for no chalk dust in the kitchen, plus wet erase means the kids can't accidentally rub out important info), along with an envelope sponge and a scat and snot wipe for erasers.
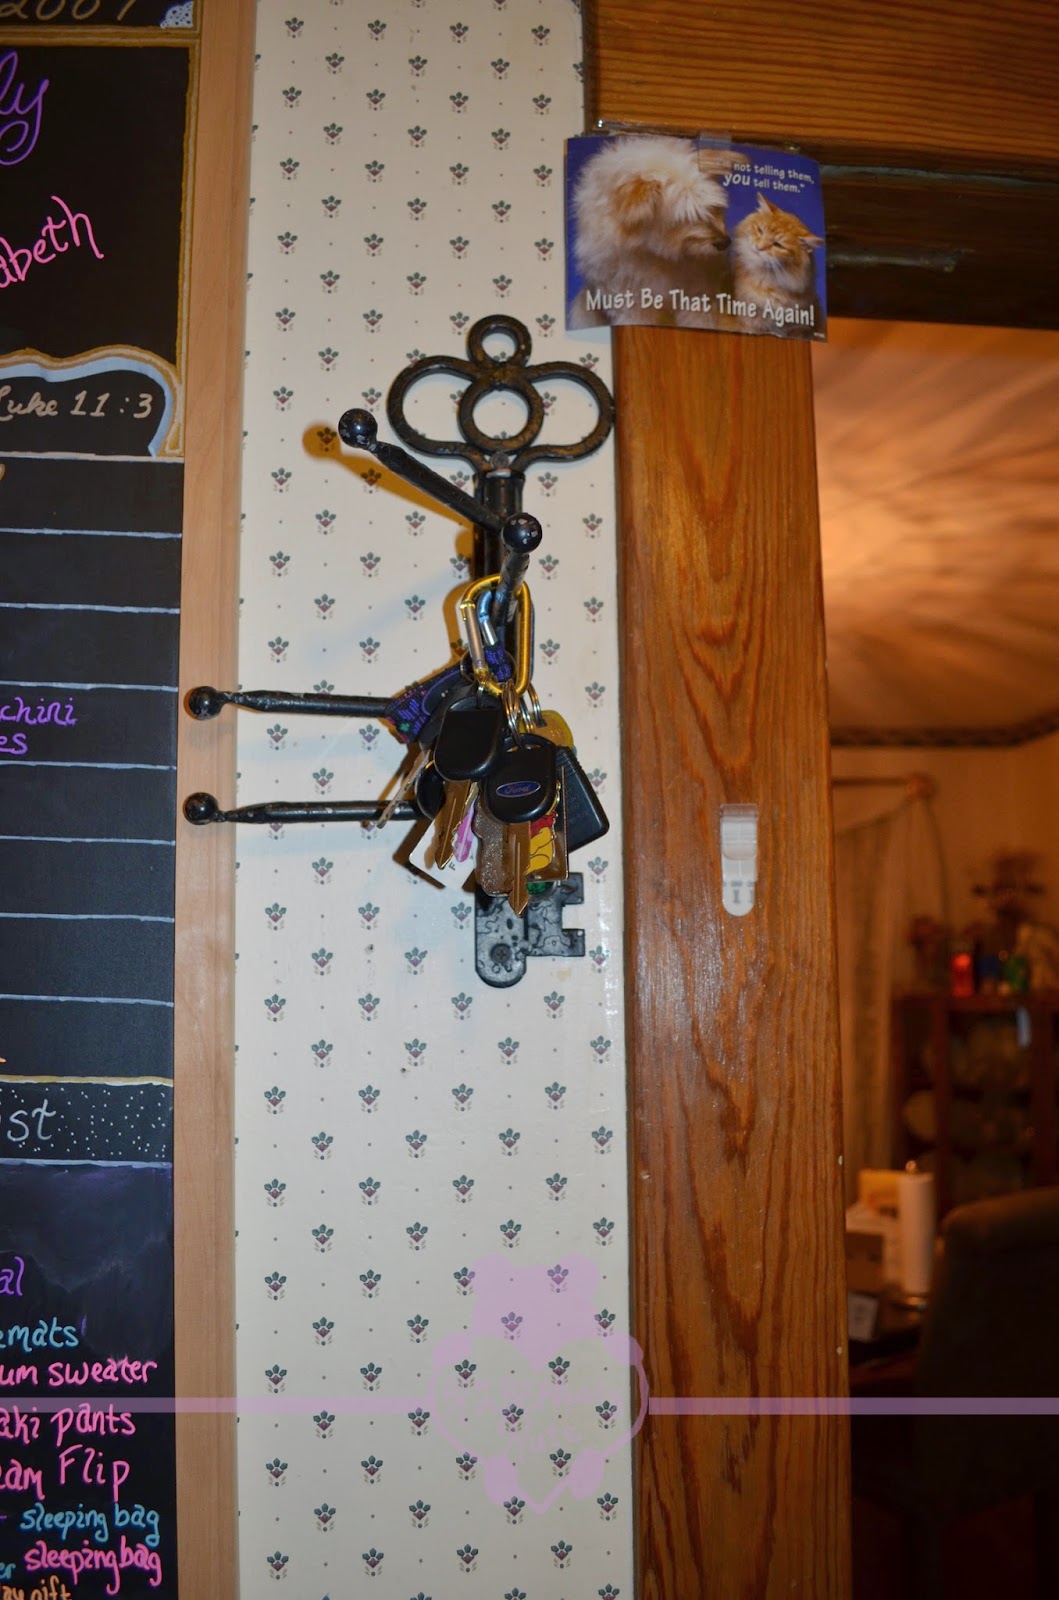
I can pretty much guarantee that Hubs won't put his hat here, knocking my keys into his snow boots or behind the shoe bench.  Bonus, enough room for the far-off day when the kids need keys.  Command Picture Clips hold important mail that we need to see again (like this postcard from Sherlock's vet...although I *still* haven't remembered to call). I'm thinking about sticking the wedding invitations we have lying around up there, too.
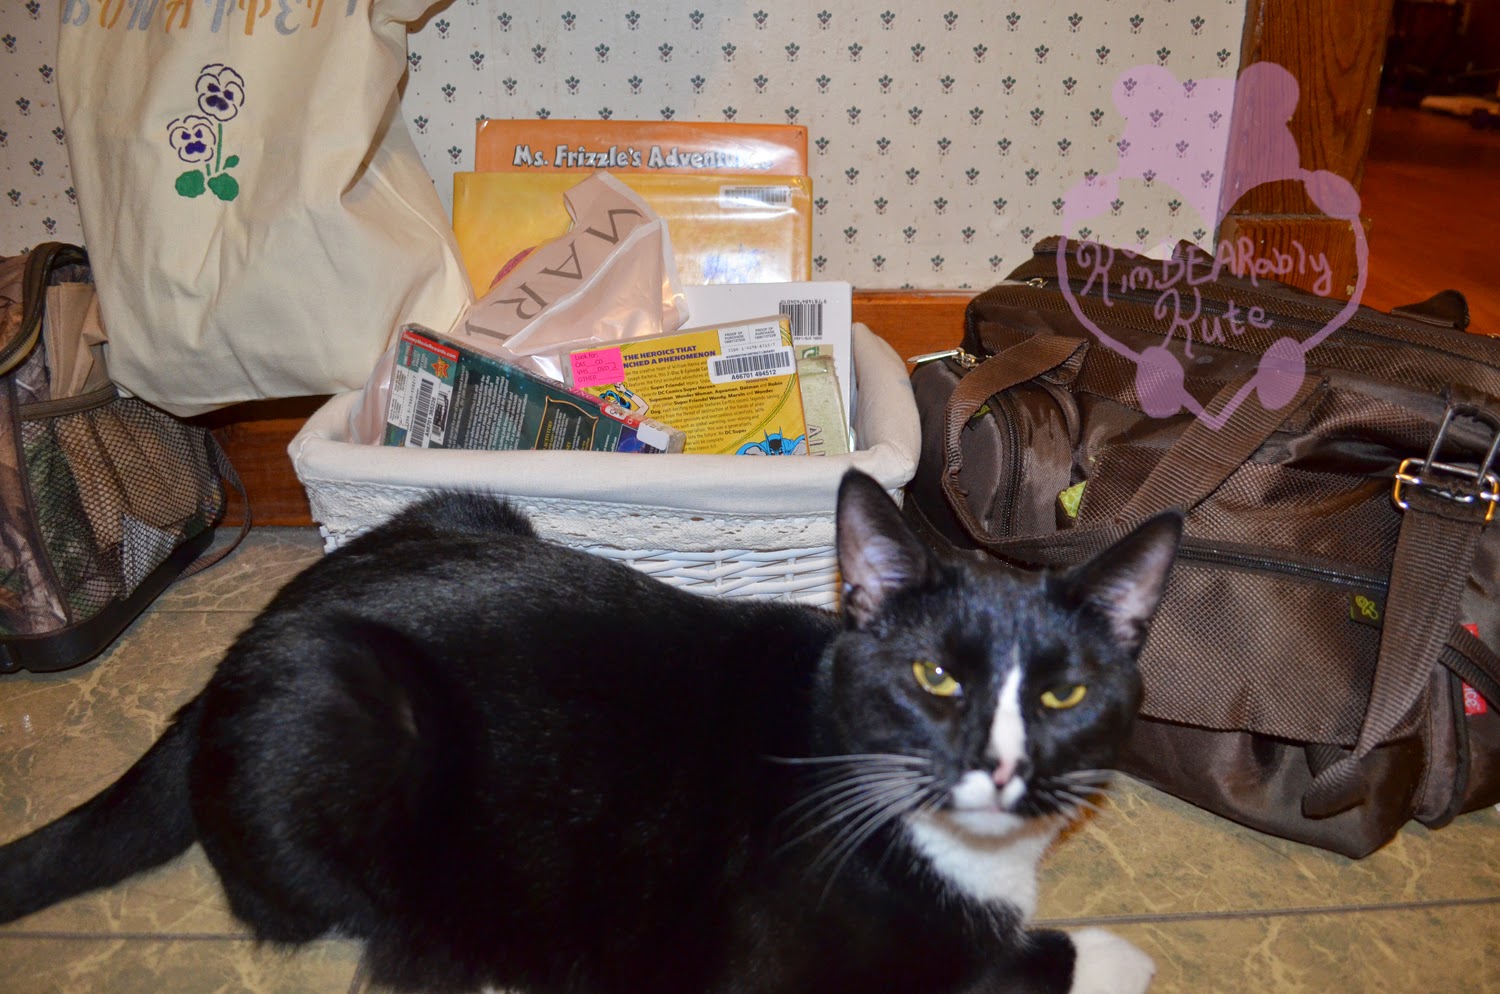
Hubs has always kept his lunch box in this area.  It is now also the designated diaper bag spot (no more searching an entire floor--or 2--when running late) and I've added the basket I used to use for Bitty Bear's photoshoots as a place to keep library materials (and outgoing Mary Kay products that I need to remember to bring to my clients).  Sherlock seems to approve of the new arrangement.

Keep it Kute!

08 May 2013

Some Things I've Made Lately.

Iron-on t-shirts for my cousin's little boys
The bestest birthday card in the history of ever:


Painted, sponged, and hot-glued letters.


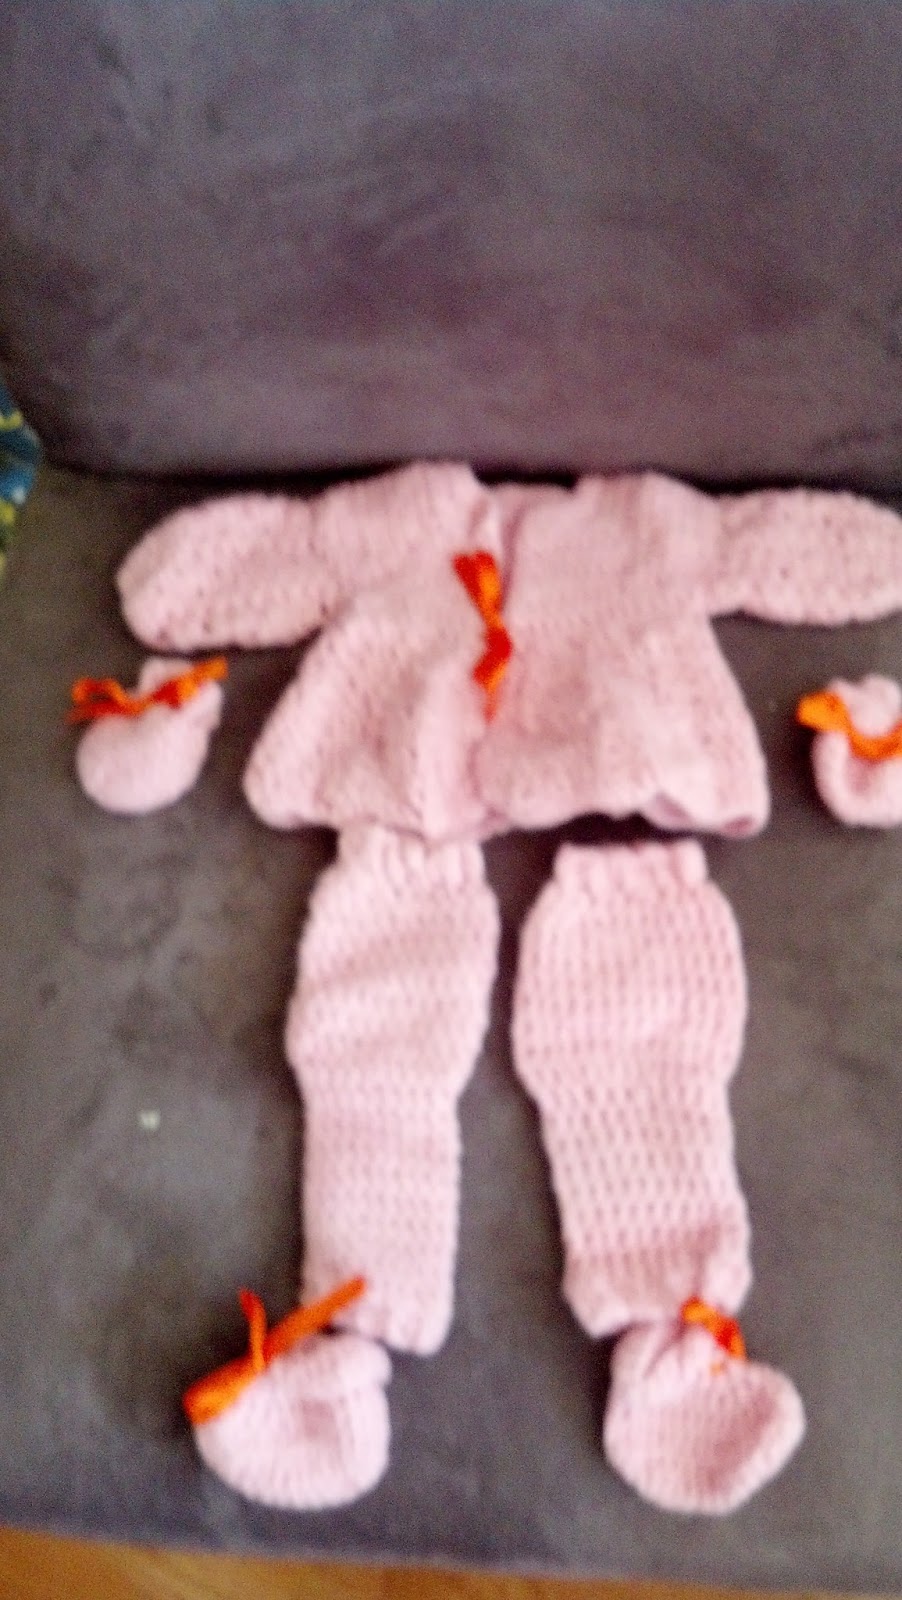
Crocheted sweaters, mittens, legwarmers, and booties for Bitty Bear to ward off air-conditioning chill at the hospital.


Keep it Kute!

Quick and Dirty: Scat and Snot Swipes Tutorial (and Simple Scat Swipe Solution)

I've been promising some folks on Facebook this tutorial for a while.  This is an easy way to make your own cloth wipes at home.  We use these in the wipe warmer for diaper changes, and keep some dry ones on the Bear's nightstand, since he can't be trusted not to rip up a whole box of facial tissue.  They are so soft for little bums and noses, plus they can be any fun color you or your kids like.

I start with soft flannel in fun prints.  I like to buy 1 yd of each print.  Then, I cut each yard into ~8 inch strips.
Next, I cut each strip into ~8 inch squares.
 After that, I pair the squares and match them up corner-to-corner, wrong sides facing.  Some of them I mixed and matched fabric; others I did the same fabric on both sides.
 I sew them together on the machine.  I use a ziggy-zaggy, over-lappy stitch (like my technical terms?).  Here's a picture of the settings I used on my machine, but of course, ever machine is different.  I think if you have a serger, that would work really well.

 Finally, I trim any loose threads and ragged edges.  This time around, I decided to use pinking shears.
And that's all, folks!

The solution I use in my wipe warmer is easy to make, too.  Just a ratio of 1 c tap water, to 2 tbsp baby shampoo and 2 tbsp baby oil.  Shake it in an old bottle or jar and pour over wipes in your warmer.  This solution doesn't work very well for moistening dry wipes on the go, so we keep disposable wipes in the diaper bag, but it really gets the job done at home.

Happy wiping, and Keep it Kute!


13 April 2013

Newborn Gown Tutorial and Link to Matching Mommy Hospital Gown

So, I don't enjoy wearing hospital gowns...not that anyone does.  I just wore the standard gown the whole time I was in the hospital with the Bear, but I really didn't feel good about how I looked when the family came to meet him, or in our first pictures together (my hair was also nasty, which is why I got it cut this time around).  Anyway, my SIL (who is due 3 days before me) sent me this link http://www.craftycupboard.net/2011/11/hospital-gown-tutorial.html and we went fabric shopping together, and it was all kinds of fun.  I've already made one gown for after I get a shower; planning to make a second one to wear home, because it will be more comfy than ill-fitting maternity pants.

Then I found out that Bitty Bear was a girl (yay, one of each!), and I thought it would be fun to make her some matching gowns--yes, I am going to be that Mom ( I made a matching necktie t-shirt for the gowns that I just made, so the Bear can match us when he comes to the hospital to meet baby sister...Hubby says the fabric for our coming home gowns is too girly for the Bear, though). I thought one of those newborn wrap shirts with a skirt added would be perfect, but I couldn't find any patterns I liked on the interwebs, so I designed my own.  Here is a tutorial in case you want to make one for your little girl.

Materials:
1 newborn size wrap t-shirt (or larger size if desired)
1 yard of desired fabric print
coordinating ribbon (I'd make sure to have at least half a yard, just in case)
coordinating thread
white thread
iron/board
needles
scissors
pinking shears
rotary cutter (optional, but useful)
straight pins
tailor's chalk
large fabric ruler
sewing machine (optional, but useful)


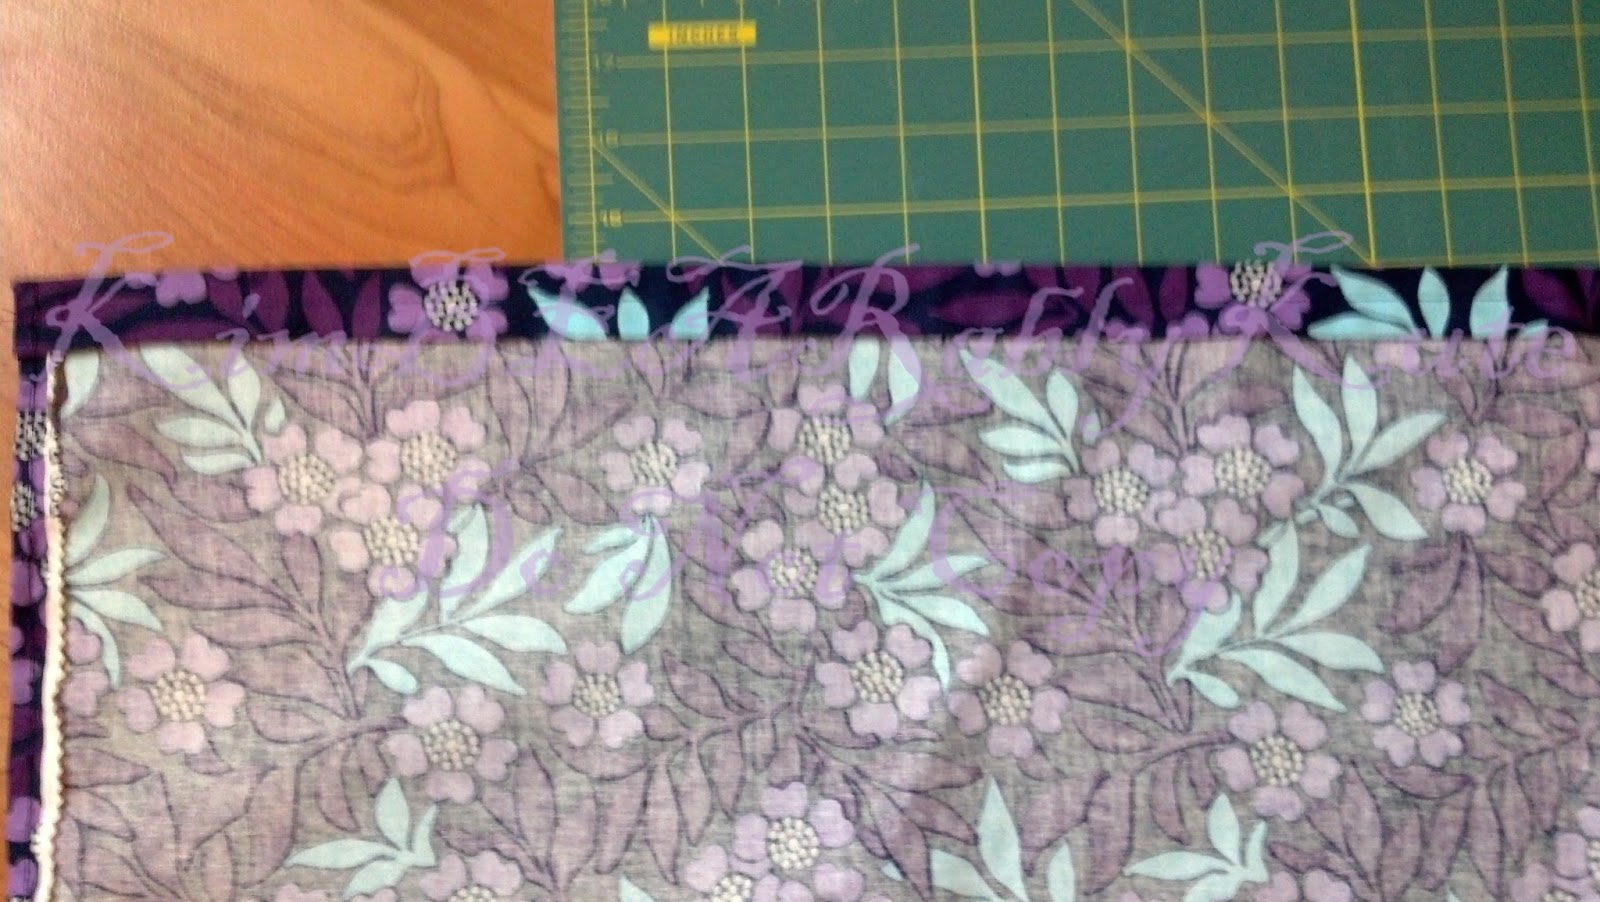
  1. Hem the selvage sides of the fabric (no need to cut off selvage as it won't show) with ~1/4" seam and finish the inside edge. I like to iron my hems before sewing.  Pink the edge you will use for the top of the skirt.
  2. Cut fabric to desired length--you will use the full yard for the width of the skirt, but you probably won't want all the length.  I tried to make my gown ~24" from shoulder to hem, so I pinned it where I wanted it on the t-shirt, and then added a 2" seam allowance and marked that for cutting.  (That leaves enough fabric for me to try making a short skirt for a onesie when she is older, so she can still match the Bear).  I ironed and sewed a 1" doubled over hem to give the bottom of the skirt some weight.
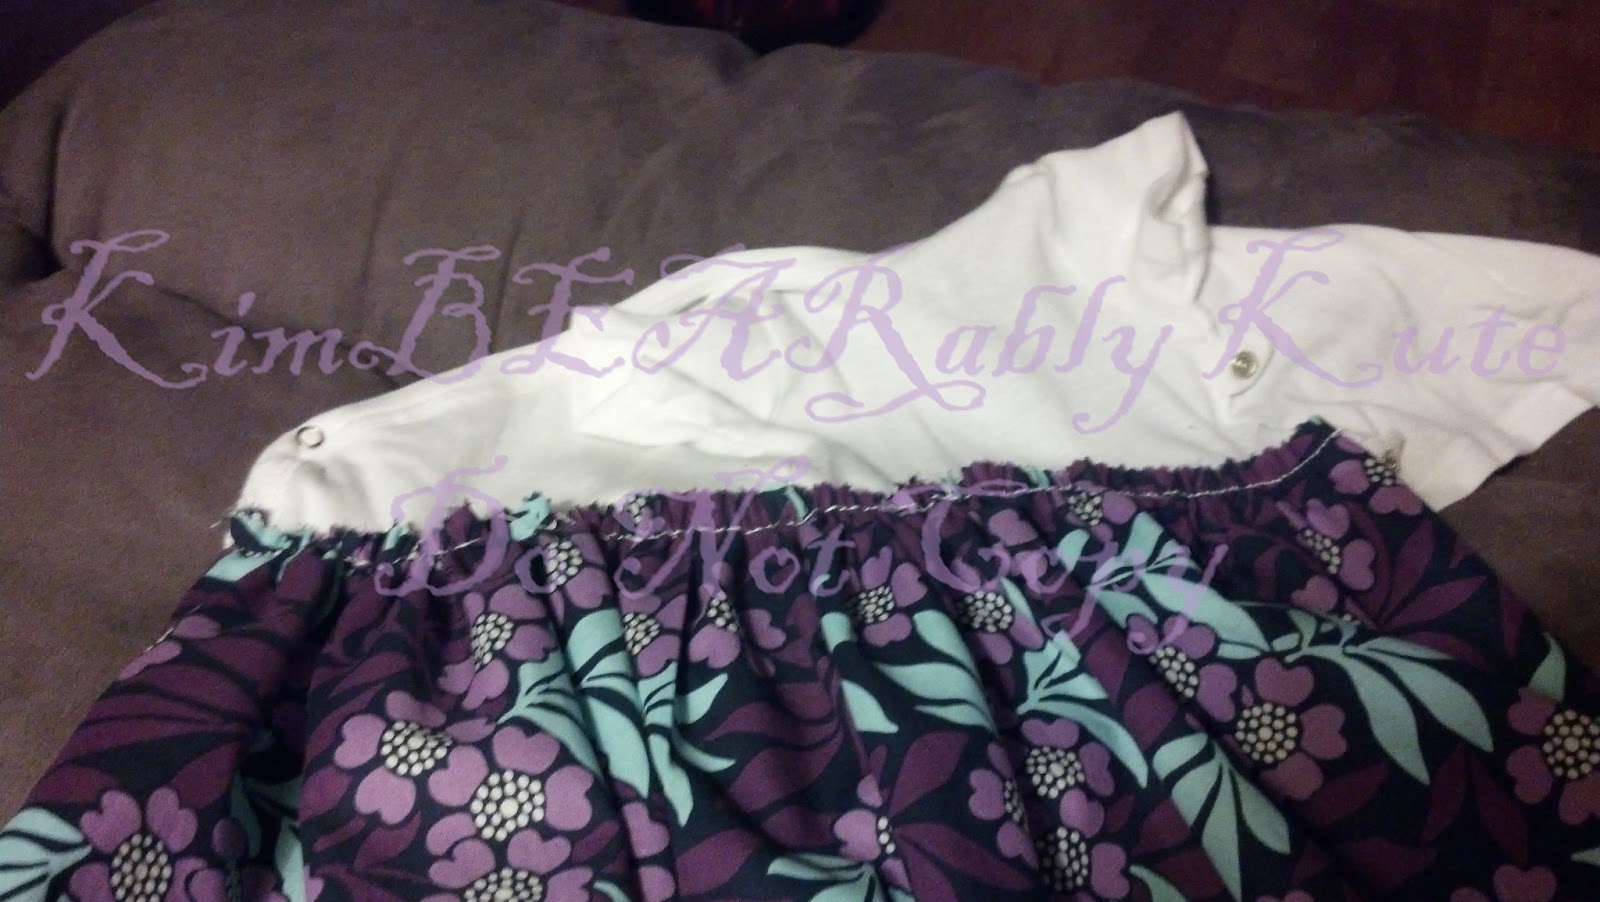
  3. Make a gathering stitch along the pinked edge, gathering it to just slightly wider than the part of the t-shirt you want to sew it to.  I choose to have mine reach from one set of snaps to the other without overlap to make fastening the snaps easier.
  4. Using the white thread, sew the gathered edge at the desired height on the t-shirt.  Don't worry about your stitches being pretty, as they will be hidden; just make the gathers as even as possible and try to keep the skirt in a straight line.  I found it helpful to draw a chalk line on the t-shirt where I wanted the skirt to go, and to pin the skirt at the edges and in the center.  I chose to attach the skirt half-way between the top and bottom snaps.
  5.  Cover your seam and your pinked edge with coordinating ribbon trim--you'll want to make sure your stitches are even this time. You'll want to sew both the top and bottom edges of the ribbon.


  6. I sewed a little bow to a beanie to go with it. All done!


    I plan to crochet some scratch mittens, booties, leg warmers, and a cardigan in coordinating shades of purple.  That way, diaper changes are easy, and so is adjusting the outfit depending on her body temp (it will be July, but the Bear had trouble staying warm for the first 48 hours when he was born in August).

    The Bear's matching shirt
    Bitty Bear's homecoming gown--Hubby says this fabric is too girly for the Bear.

    Keep it Kute!

23 March 2013

Because Girls Aren't the Only Nurturing Ones...

My little boy is a nurturer.  He's *usually* gentle with the younger babies at church (although once in a while we think he is in danger of hugging and kissing them to death).  He likes to take care of Mommy when she is sick.  He's been praying for a baby sister for over a year (about the time he was articulate enough to pray on his own...looks like God will be answering that prayer in the affirmative come July, yay!).  He *gasp* likes to play with baby dolls.

Don't get me wrong, he is a man's man when it comes to building blocks, cars, trains, tools, more cars, running, balls, being loud, more cars, superheroes, and more cars.  But he has a baby doll that he loves.

If you've been reading my sporadic blog over here, you probably know I crochet...and that I like to crochet baby clothes as gifts.  Well, I have some of my old baby dolls in the attic, hoping to pass them on to Bitty Bear when she, you know, is born and grows big enough to play with them.  Sometimes I bring them down to model the clothes I'm crocheting, to make sure I got them right, you know.  Well, about a year ago, the Bear found one of my baby dolls and claimed it for his own.  It is a beautiful, big doll that looks like a real newborn (I used it for my Baby Boot Camp and breastfeeding classes when I was pregnant with the Bear, too).  When the Bear found the doll, we were trying to grant his wish for a baby sister, and we wanted him to know how to act around babies, so we let him keep it.  I found a doll bottle, and we dressed it in some of his old clothes with ducks (because he also loves ducks).  He named it Kit (came up with that on his own; we don't know anyone named Kit, and I've never read him any American Girl books...we might have watched an episode or two of TailSpin...).  Anyway, Kit changed genders a few times, but I think it's finally been established that Kit is a boy, and the Bear is Kit's Daddy, and I am Kit's Gannyma.

For a while, Kit alternated between sleeping in the Bear's old infant car seat and in the Bear's Lightning McQueen bed.  But we're going to need the car seat for Bitty Bear, so Kit needed a new bed.  Mommy searched Walmart and Toy's R Us, and guess what?  All doll beds are pink.


We've never told the Bear he can't like pink because he's a boy, but he came up with that idea on his own (he really likes purple, though, after blue and yellow).  Plus, pink would totally clash with the Bear's red race car bed.  So Mommy and Daddy painted it.
Now it looks like this!


We just used some primary colored acrylics on the pink part (ok, they chip quite a bit, even after applying a spray-on sealer).  Then we glued leftover McQueen and Mater fabric from the Bear's valances to the cardboard mattress. Yay for a boy doll cradle!

I post this, not because I'm proud of what a great job we did, because I'm seriously disappointed with the paint flaking off onto the carpet and Kit's poor little head...and the bed is slightly too small for the doll, so sometimes it falls apart if we're not careful.  I post this because I hope someone in the toy manufacturing biz will see it and think to make at the very least, some gender neutral doll beds.  I mean, even if my boy is the only one who is Daddy to a life-size newborn doll, I know there are little girls out there who pretend to have doll sons as well as doll daughters.  Or maybe not anymore, but there were boy baby dolls when I was growing up.  And some girls just don't like pink as much as others.

There's going to be some pink in Bitty Bear's room.  We painted her closet pink tonight.  But I've never, not even as a kid, liked the mindset that everything for girls had to be pink.  And as the mom of a very well-rounded little boy, I don't like the mindset that every toy that is about nurturing or parenting has to be marketed to girls and be pink. Please tell me I'm not alone?  Someone, please make some toys for future big brothers and future daddies, too!

23 February 2012

Stuff and Things (Kim hasn't been on here enough)

Well, I wanted to show you some of the projects I've been working on lately.

Got sidetracked from my crocheting by remodeling Barbie's kitchen.


Would you believe those all used to be Pepto-Bismol pink?  I have some more Barbie furniture that I painted that I have yet to photograph.

As the wife of the Commish, I feel obligated to make some cool dessert for the church Superbowl party each year.  This year's contribution:

And, I threw my mom a surprise b-day party--her first in 10 years.


It was a "Stampin' Up" party.

Keep it Kute!